Internet gateway for your network
 The Linux Router Project
(LRP)—"Embedding the Bird for the Sake of All Humanity"—is a tiny
Linux distribution that fits, and runs off a single floppy drive. It’s designed to
allow you to convert almost any old hardware lying around—even a 386—into a
network router, gateway, firewall, or almost anything else you can think of. Of course,
you can use it like any other router or gateway on your network, irrespective of what
network operating system you are using.
The Linux Router Project
(LRP)—"Embedding the Bird for the Sake of All Humanity"—is a tiny
Linux distribution that fits, and runs off a single floppy drive. It’s designed to
allow you to convert almost any old hardware lying around—even a 386—into a
network router, gateway, firewall, or almost anything else you can think of. Of course,
you can use it like any other router or gateway on your network, irrespective of what
network operating system you are using.
Installing the basic router is a piece of cake once you figure out how. The first thing you discover is that there isn’t as much documentation. More importantly, there are no "step-by-step" setup instructions to get you going. There is an "Idiot" setup, which works, but you will probably need to customize it further to your needs. Additionally, several important steps in the setup, such as adding functionality (through additional packages), aren’t documented anywhere but on the mailing list.
Setting up
Creating an LRP disk doesn’t require you to have a Linux system available. You can create it entirely from within DOS or Windows. You will additionally need a "zip" and "tar" utility to extract the files. WinZip (on the CD-ROM) will do both.
If you choose to use the Idiot install, then it is simply a matter of using the supplied "rawrite2.exe" to copy the disk image to a floppy for an instant start. But before we start, here’s a warning: Be sure to have brand new, freshly formatted floppies before you begin. Save yourself hours of frustration by not trying to use old dusty floppies.
Find out the exact model, name and IRQ and I/O settings for your network adapter(s). If you are using PCI plug-n-play cards, you are not likely to have a problem. Even so, it’s better to have the details written down somewhere. In the case of old ISA adapters, you will have to configure them beforehand to eliminate any potential conflicts. Usually these cards have a DOS utility to save the configuration to EEPROM.
Installing the Idiot way
Copy the file CDROM:\cdrom\Linux \router\software\utils\rawrite2.exe to a directory in your path, such as C:\win dows\command.
Cd to the directory CDROM:\ cdrom\Linux\router\software, and type in:
rawrite2 idiot.image-2.9.3-
1.44MB a:
If you’re doing this in DOS mode, you will have to substitute the short name "idiot~1.44m".
Once the file has finished copying, you have a fully usable LRP floppy, though at this point, without networking support.
Now use WinZip (if you’re in Windows) to extract the appropriate modules for your network adapter(s) from the archive CDROM:\cdrom\Linux\ router\software\kernel\kernel-36pre2-1.tar.gz and copy those to the LRP floppy. Overwrite the existing "modules.lrp" file on the floppy with the file from CDROM:\cdrom\Linux\router\software \base
Now you have your disk ready.
What’s on the floppy? The LRP is a Linux distribution with its own package format. It ships with: bare-bones 2.0.36 kernel, full set of compiled modules, and packages for ppp, snmp, ssh, WAN router, gated, and several others. You can additionally add almost any other components you wish to the setup, provided you can accommodate them on the boot disk you are using. The LRP has three basic packages—the "root" package which contains all the binaries in /usr/ and /bin, and any configuration files or scripts needed before other packages are loaded. The "etc" package which contains all the config files in /etc/. The "modules" package, which by default, is empty (you have to choose your own modules), and the kernel image itself. The boot device (the floppy) itself is not usually used after booting. A RAM-disk (/dev/ram0) is created at boot time, on which a minix file system is created, and a raw system image is copied by the boot loader. After this, the additional packages are loaded and uncompressed, and the router then runs entirely out of RAM (Fast!). However, since all configuration changes you make to the system exist only in RAM, you have to back up the root image to the floppy to save it for the next boot. Hardware requirements are modest, starting with a 386SX with 8 MB RAM. A more practical solution calls for a 486DX2, or old Pentium and 16 MB RAM. You can even use a Iomega Zip disk or Imation LS-120 floppy drive, which can turn your router into a full fledged Linux distribution, albeit with the increased cost of hardware. |
The "roll-your-own" way
If you want to choose your own components, here’s how to go about doing it.
Extract the file "syslinux.com" from the archive CDROM:\cdrom\Linux\ router\software\utils\syslinux-1.40.zip., and copy it to a directory in your path. Put a DOS formatted floppy in the drive, and ‘syslinux -s a:’
Now extract the kernel archive CDROM:\cdrom\Linux\router\software\ kernel\kernel-36pre2-1.tar.gz
There are two stock kernels available, one with FPU emulation (if you have a 386/486 SX), copy the kernel of your choice to the floppy drive as "Linux". Now CD to the base subdirectory, and copy the files "etc.lrp", "root.lrp", and "modules.lrp" to the floppy disk. If you want to enable logging, copy the file "log.lrp" as well. From the boot directory, copy the files "syslinux.dpy" and "syslinux.cfg".
Your disk is ready. Before we progress, it’s a good time to read the accompanying HTML docs on the CD.
Configuring the router
Now that you have the floppy ready, it’s time to configure your router.
Take your floppy over to the machine you want to use as your router, (which we assume doesn’t have niceties such as a CD-ROM or hard drive. You will need a keyboard and monitor initially), and boot it. To start with, networking will not be initialized—you still have to configure it. Login as "root" when prompted, and you will be presented with a simple menu interface to configure the system, networking, and modules.
Select "Networking configuration" from the menu. You can edit all the system networking files from here.
The first item—IPs, routes,
ipfwadm—allows you to specify how many network interfaces you have and their IP
addresses. You also specify ipfwadm and IP masquerading rules.
(See the May ’98 PCQ article on setting up Linux as an Internet gateway,
www.pcquest.com/may98/gateway. html, for details). By default the script allows up to four
network interfaces, but its simple to add more if necessary. Simply uncomment the [IF0]
line to enable the first interface, [IF1] for the second, etc. You will also have to set
the IP and Broadcast addresses.
Further down the file you will see entries prompting you to add static routes, gateways, etc. If you’re lost at this point, its strongly suggested that you read the Linux Net-HOWTO’s (http://metalab.unc.edu/LDP/) before you attempt to go any further.
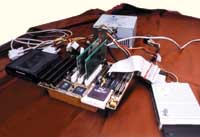
Next edit the file /etc/hosts to give yourself a machine name and domain name. We named our router "shoebox", because that’s what it would fit in. Similarly, add entries for which networks your machine will belong to in the "networks" file. Edit "hostname" to give your machine a hostname, "resolv.conf" to add nameservers for your domain and "gateways" to specify gateways for routed (if necessary). Once you have set up the networking options, press "q" to return to the main menu, and select "System". Here, you can edit the securetty, syslog, inetd.conf, and inittab configuration files if you want. All of them worked fine with default values in our case.
Finally, select the "modules" option from the main menu, and uncomment the entry corresponding to the ethernet drivers for your network card(s). When editing the modules file, it is important to list the modules in the order in which they are to be loaded. If module "B" is dependent on module "A", then module "A" must come before module "B" in the list. If you need to specify parameters to the modules, you may do so. For example, "ne io=0x330, 0x350"
When you are done, press "q" repeatedly to exit to the command prompt. Immediately secure "root" with a password.
Create a "/mnt" directory in the root,
and mount the floppy drive
mount -t msdos /dev/fd0 /mnt
Copy the modules (*.o) to the directory /lib/modules. Then delete the modules from the
root of the floppy drive.
Type "insmod /lib/modules/module name.o <paramters>" to load the modules. If all goes well, you will see a message notifying you that the drivers have been loaded. If not, you may have to specify additional parameters for your module.
At this stage, you should back up your root to the floppy. Unmount the floppy with "umount /mnt". Type "lrcfg" to return to the menu, and press "b" to begin writing your configuration to the floppy. Once it is finished, exit the menu, and reboot the system with "reboot".
When the system boots the next time, you should be prompted with a login prompt "shoebox login:" (or whatever you call it). Type "ifconfig" to see a list of active network interfaces. You can then try pinging other machine and from other machines. Since the routing tables are created by default, you should be able to ping across subnets. If not, check your routing tables with the command "netstat –nr".
Setting up the gateway
To set up the machine as a PPP gateway (a Web connection sharing device) to the Internet using ISDN or modem, you need to add the "ppp.lrp" package to the floppy from the "packages" subdirectory on the CD-ROM. Then edit the file "syslinux.cfg" and add the entry "ppp" at the end. The end of the file will now look like this:
append=load_ramdisk=1 initrd=root.lrp initrd_archive=minix ramdisk_size=4096 root=/dev/ram0 boot=/dev/fd0,msdos LRP=etc,log,modules, ppp
If you have not set up ppp on a Linux system before, read the article in the May issue. The ppp configuration files such as /etc/ppp/options, can be edited from the menu.
Now you will have to include the modules for header compression ‘slhc.o’, ppp ‘ppp.o’, and serial interfaces "serial.o". Again, these files will need to be copied from the kernel archive in to the directory /lib/modules. Run lrcfg to edit the modules file and add entries for the three modules in the order serial.o, slhc.o, ppp.o. Now manually install the modules using insmod.
Back up your root image, and connect to the Net using:
pppd connect ‘chat -v "" ATDT3334000 CONNECT "" sername USERNAME assword PASSWORD ‘ /dev/ttySX 115200 debug crtscts defaultroute
If you have trouble connecting, you can monitor the progress of the call from the /var/log/messages file (provided you have enabled logging). A stripped version of minicom is available on the CD-ROM as well, if you wish to use that to establish your connections.
You can easily customize the router for your needs, such as using a high capacity boot disk (a 100 MB Zip disk), adding memory to increase the size of the default ram disk, and adding any and as many packages as you can fit in. You will find several add-ons and packages on this month’s CD-ROM. The router makes an ideal replacement for hardware such as PowerTel Boca’s WebRamp, especially when used with an ISDN connection. The router and gateway that you just got going will cost about Rs 4,000 even if you were to buy it.